
Drywall Installation
Contact Us

When you are renovating your house, drywall installation is an essential skill. With minimal investment, you can transform a space such as a basement or a garage.
The key to successful drywall installation is correctly attaching the drywall panels and framing members. You can finish rooms inexpensively once you are proficient in hanging drywall.
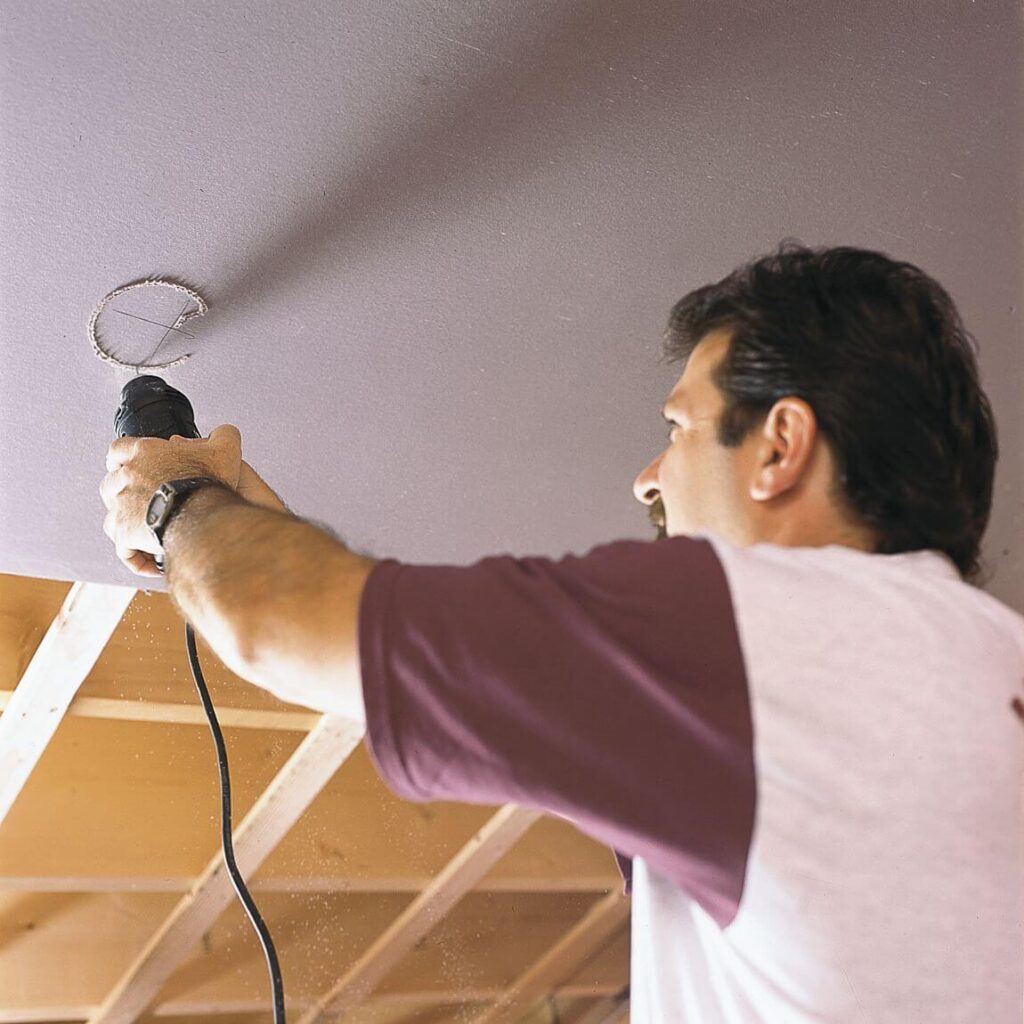
The majority of drywall is made from mineral gypsum. It is heavy and bulky. You might consider purchasing a cheap plastic drywall carrier. This will allow you to keep the drywall sheet on your side and not twist your arm. You can do the installation yourself, but it will be easier to have someone help you, especially if the ceiling is covered. You will need to finish the joints after hanging the panels. This will include wet-sanding to reduce dust from drywall and drywall compounds. It is labor-intensive, but it is only one part of hanging drywall.
Instructions
Before you begin hanging drywall, inspect the joists and studs for twists or bows. You will get the best results if your studs are flat.
Visually inspect the studs and joists to verify that they are in alignment. Hold a straight, longboard or level across framing to confirm alignment. For large installations, trim any framing members that stick out with a saw or power planer. Fill in any gaps with shims that have been attached with glue or nails.
To check for stray screws and nails that could impede the drywall, run the head of your hammer up and down the studs.
Drywall Fastener
Drywall can be attached to framing using drywall screws or nails. For most drywall installations, drywall screws are the best fastener. The head of drywall screws is fluted and can be recessed slightly below the surface of drywall paper to prevent it from breaking. They also have coarse threads to ensure the best hold on the drywall’s gypsum core. Screws are faster than nails and can cause minor damage to the drywall’s face. They also hold the drywall better to the framing than nails.
However, drywall nails have their place. Drywall nails are faster than drywall screws if you have to install large amounts of drywall quickly. Both are available in the next step.
Option to Drive in Screws
The same procedure attaches drywall panels to the ceiling and walls.
To cover the drywall’s surface with joint compound, screws must be driven to the bottom of the drywall. You should not drive the screws too deep to damage the gypsum core and tear the paper. The fastener’s holding power is diminished when the paper is torn.
Properly driven fasteners are slightly countersunk below the surface. A cordless drill equipped with an adjustable clutch can control the depth of the screw. The screws should penetrate the framing to a minimum of 5/8 inch. This means that you can use easy-to-find 1-1/4 inch screws for both 1/2-inch and 5-/8-inch drywall panels.

Option to Drive in Nails
Like screws, nails must be driven under the surface of drywall to allow the joint compound to cover them and then sanded to make a smooth surface.
Drilling drywall screws can be more complicated than drilling drywall nails, but hammering drywall nails is much easier. Drywall screws can quickly penetrate drywall paper and tear it apart. The broad, smooth head of a hammer makes it possible to create several blows before the paper tears. The same procedure can be used for ceiling and wall panels.
A curved-face hammer will create a slight dimple around the nail head. Ring-shank drywall nails are best as they have a broad authority that holds the drywall in place. The nails should penetrate the framing to a minimum of 3/4 inch.
The Drywall can be hung on the Ceiling.
Start with the ceiling if you plan to cover both the ceiling and walls with drywall.
Fasteners should be placed twelve inches apart when attaching drywall to ceiling joints that are sixteen inches in diameter. For wall studs, the maximum spacing between pins is sixteen inches. Screws or nails should be driven into every stud below the panel. Attach fasteners every eight inches along the untapered edges to avoid damaging the gypsum’s core. However, keep them at least 3/8 inches from the edge.
Drywall Can Be Placed On Walls
Once you have covered the ceiling with drywall, attach the top sheets to the wall. When installing horizontally oriented drywall, start with the top and work your way down. It is crucial to place your cut side on the floor so it can be covered with baseboards.
With a pencil, mark the locations of wall studs along the ceiling drywall’s edges. This will help you locate the stud centers for drilling screws into wall panels.
Lift Wall Panels into Place
After marking the locations of the studs, you can use a drywall lifting device to position panels.
Install top panels on a wall using screws temporarily driven into the studs approximately fifty inches below the ceiling. To place the board on the screws, use a drywall lifting tool. Grab your drill or screw gun in one hand, and slide the panel up with your shoulder and other hand. Then drive a screw from the bottom into the center stud and work your way up the panel.
Continue lifting each panel onto the screws. Hold the drill while sliding the board in place with the other.
The bottom panels should be snugly fitted against the top panels. Cut pieces using your drywall square.
Visitors look around homes to see the artwork, photos, furniture, and paint color. The paint finish on walls and ceilings beneath the paint is not what draws the eye. It won’t unless it’s cracked or slumped, poorly patched, or otherwise damaged. Drywall is the most famous ceiling and wall replacement option for older homes. A well-installed, smooth, or textured surface makes your home’s decor and furnishings shine.
Understanding the various types of drywall and the factors that impact the cost of drywall installation is essential. While some expenses are obvious such as those for screws, tapes, mud, and joint compound, others, such as demolition and permits, transport, permits, and the amount of sandpaper required to complete the job well, might not be.
Many types of drywall provide soundproofing, waterproofing, and fire resistance. Additionally, there are basic styles that support tiles or shiplap walls. Many finishes are available to complement the design of your home and lower the overall cost. It’s helpful to know the prices of drywall panels and their installation to make this decision easier.
Professional Installation and Hanging
A qualified professional drywall hanger from Wellington Pro Painters & Popcorn Removal is the best option, depending on how the drywall is applied. There are two costs to hanging and finishing drywall.
The Overall Area
Surprisingly, dry walling in a smaller room can cost more per square foot than in a larger one. A larger area allows for more options to use scraps or full sheets to fill in gaps between walls—the overall cost of drywall drops. When homeowners decide that hanging drywall throughout their entire home at once is the best option, it is less expensive.
However, the cost of the total area is not just dependent on its mathematical value. The total will also depend on how many cuts are made, the fit, and the level of finish. The finishing materials cost will go up if there are more corners or specialized scratches. Corners require unique beading to keep clean. Some drywall contractors might charge a minimum fee. This could be more than the actual cost of installing drywall in small spaces. Bundling multiple rooms together may help you save money overall.
The cost of installation will increase with each degree of finish. These textures can be added before level five, which can help reduce the overall cost of installation. These textures can increase the price of the final product due to their impact on material and labor costs.
Insulation
Homeowners must include costs for materials and insulation in their budget when adding new or exterior walls to their homes. This will ensure that the building is energy efficient. The most popular insulation option is batt. However, many other options are available, with prices ranging from $0.10 to $30 per square foot.
Drywall removal
Many homeowners overlook the cost of demolishment and replacement of walls. This part of the job is often portrayed as a stress-reducing, fun task that requires a hammer. However, in actual renovation scenarios, it is crucial to be cautious. Damage to your home’s electrical outlets, wiring, or other components will increase the cost. A non-load-bearing wall can be demolished for around seven hundred dollars. However, if the wall is load-bearing, it may require rerouting or repairing other systems. This could cost up to three thousand dollars.
Permits for Demolition or Remodeling
Are you required to obtain a permit to replace or add drywall? If you are returning a damaged wall and only need to do so for a minor repair, there is no need for a permit. It is crucial to verify with the local government if your drywall project involves electrical work or plumbing.
Asbestos Removal
Anyone who lives in an older home knows that it is essential to ask the asbestos question before disturbing any existing materials. If this is your first time removing walls, this is the right time to do so. If asbestos is found in old plaster walls, tile, and adhesive, it can cause lung damage and severe illness. Determining if asbestos exists in an older building is critical before you begin work is critical.
Locations We Serve
We offer the above services at the following locations within Wellington:
Additional HOAs We Service
If you are located in Palm Beach County and you don’t see your city/area listed above, don’t worry! We cover all of Palm Beach County. Fill out the contact form above or CLICK HERE and send us a message. We’ll get back to you asap!
Here is a list of our services you can get at Wellington Pro Painters & Popcorn Removal:
-
Commercial Painting Near Me
-
Commercial Popcorn Removal Near Me
-
Drywall Repair Near Me
-
Drywall Installation Near Me
-
Knockdown Texture Near Me
-
Orange Peel Ceilings Near Me
-
Residential Painting Near Me
-
Residential Popcorn Removal Near Me
-
Smooth Ceiling Finish Near Me
-
Commercial Painting Services
-
Commercial Popcorn Removal Services
-
Drywall Repair Services
-
Drywall Installation Services
-
Knockdown Texture Services
-
Orange Peel Ceilings Services
-
Residential Painting Services
-
Residential Popcorn Removal Services
-
Smooth Ceiling Finish Services
-
Commercial Stucco Installation Near Me
-
Complete EIFS Reinstallation Near Me
-
Custom Stucco and Texturing Near Me
-
Denglass Framing Near Me
-
EIFS Inspection Near Me
-
EIFS Installation Near Me
-
EIFS Wall Systems Near Me
-
Exterior Kitchen Stucco Near Me
-
New Construction Stucco Near Me
-
Stucco Application Near Me
-
Commercial Stucco Installation Services
-
Complete EIFS Reinstallation Services
-
Custom Stucco and Texturing Services
-
Denglass Framing Services
-
EIFS Inspection Services
-
EIFS Installation Services
-
EIFS Wall Systems Services
-
Exterior Kitchen Stucco Services
-
New Construction Stucco Services
-
Stucco Application Services