
Knockdown Textures
Contact Us

Do you want to remodel or build your home? This requires a low-cost wall finishing. Look no further; knockdown textures are the best drywall finish. Paint of WNY uses a variety of techniques to create this finish. First, we apply to drywall joint material to create fine peaking. Then, we knock off the peaks to make flattened ones. This can be used to reduce sound from rooms located upstairs or near.
The visual impact of the fine peaks hiding flaws in the flat wall is quite pleasing. To apply the finish, we use a spray bottle and roller.
These are the textures that we love.
Make Splatter
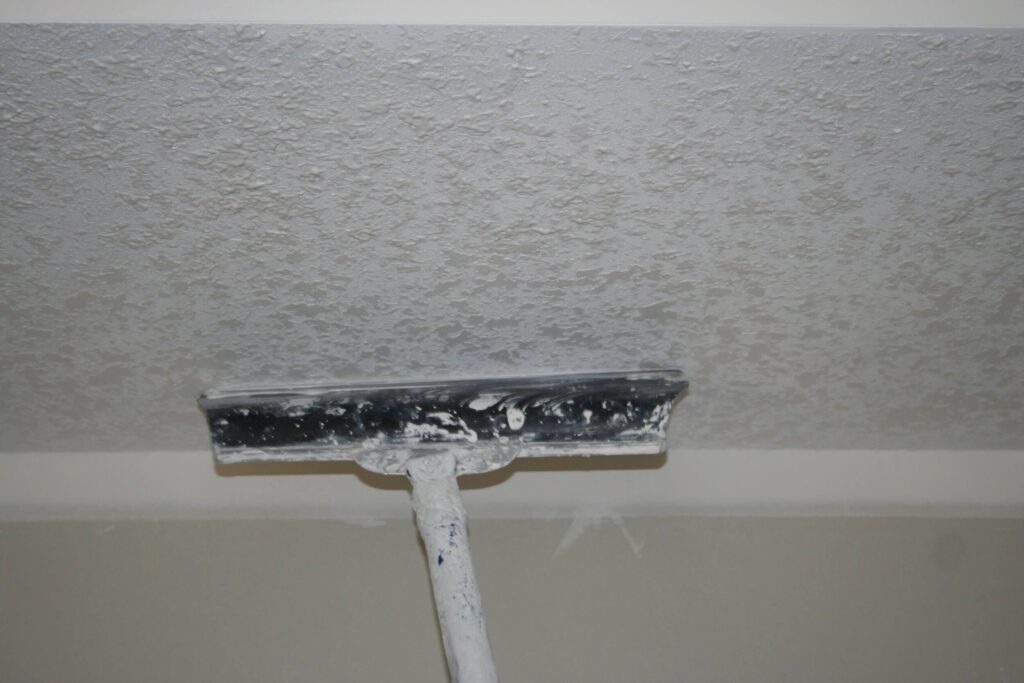
Splatter is the most popular type of knockdown texture. To make the first peak, the spray is used. Next, use the knockdown knife to flatten them. You can avoid splashback and mess by using another tool to attach the knockdown texture to your ceiling.
Stomp
This texture is much more prominent than the others. Paint of WNY creates this texture using a mixture of water and ready-to-mix drywall mud. We then apply the surface to your walls using a roller. This texture is the most noticeable.
Next, use a stiff-bristled toothbrush to create the peak impressions. For the perfect texture on your walls, use a knock knife.
Mud trowel
This texture is created using a curved trowel. It would help if you did not leave the drywall mud on the surface in globules. This texture requires patience and time. This texture is even more fascinating because it says that the best things are made over time.
So we cleaned up the work area before we started creating the textures. Knockdown Texture Installation can be made much more straightforward and safer by professionals.
For more information on texturing walls, please call us!
To begin the knockdown texture process, the room must be free from furniture, walls, or ceiling fixtures. Cover windows and doors well to prevent any damage. This will make it easier for you to clean up any mess. Prepare the walls and ceilings. Surfaces should be cleaned and free of blemishes. Next, prepare the equipment needed for the application. The next step is to prepare the compound/mud and ensure it’s consistent. Next, test the compound by applying it to a small area.
To begin the job, the applicator must be placed between 15-18 inches and the wall. The compound is then evenly applied and upside-down from the ceiling or corner. Allow the splatters to settle for at least 15-30 minutes. You can begin the knockdown process only after the compound is no longer glossy.
Some people prefer to alternate between knocking down and applying the knockdown depending on what type of knockdown they are using. It would be best to use light pressure and gentle strokes to break down the compound. Allow the mix to dry. To give the texture a smoother appearance, some people use sandpaper. This helps to eliminate any tool marks and improve the surface. The primer and paint can be applied.
Wellington Pro Painters & Popcorn Removal is sensitive to the needs of homeowners and delivers outstanding results. Contact us today for a free estimate on your knockdown texture remodeling project.
The knockdown texture is timeless. This is the best method to create a soft, durable, and cost-effective ceiling. We can help you.
It’s beautiful to look at. It is not something you can hide under your popcorn. It takes time and skill to transform a popcorn ceiling into a quality product. Expensive! Buyers won’t be disappointed. They always look this great. We can help you.
You can knock down texture by applying plaster or joint compound to a wall or ceiling and then removing it using a trowel. This will decrease the texture’s appearance. You can reveal the original drywall by removing the knockdown texture. This DIY project is messy and takes time, but it doesn’t require special carpentry skills. It will make cleanup more straightforward if the area is prepared before you begin to remove the knockdown texture.
Knockdown texture is trendy. This finish is modern in middle-of-the-USA residential construction. This finish is also used in remodeling to replacing an old popcorn finish. Even though popcorn texture was once considered a premium finish for entry-level homes, it is now being replaced with knockdown texture. The fundamental difference between splatter and knockdown is that they are similar. To achieve a leather-like look, knockdown texture requires only one more step.

Example of knockdown ceiling texture
A knockdown or splatter texture surface has a consistent round droplet design. Droplets can be as small or large as a dime. Knockdown is applied with a medium-density look to show the original surface through the droplets. Another desirable characteristic is a good “reveal.” This refers to the thickness of the droplet. More is better.
When materials are used for knockdown finishes, they can be inconsistent. For wall applications, thicker materials are preferred. The material must be solid and visible. The ceiling mix can be stale or thin. However, a more delicate mix will work better. It provides better visibility due to the gravity effects of the combination. If the blend is lighter, you can finish the application sooner than the material hardens.
Important factors are the size and thickness of your material to make texture sprayers. You will need more air and heavier fabrics for large droplet sizes. For smaller droplets, you will need to use more air but not as much as an orange peel. The nozzle sizes are 6mm to 8.8mm for tiny and medium-sized droplets. Extensive droplet finishes require nozzle sizes of 10mm to 12mm.
Drywall comes in large sheets measuring approximately 4×8 feet. Larger sheets are available for new construction.
It is similar to plywood. Hidden seams are needed between two pieces of drywall or around repairs to drywall. Applying a thin layer of joint compound to the whole drywall is one way to accomplish this. Knockdown texture is a way to finish the joint compound.
For flat walls, multiple coats of joint compound are required to make seams disappear. Builders have found creative ways to lower the cost of construction and reduce the amount necessary for common compounds.
Knockdown Drywall Texture
This is no easy job. Seeing Kenny (below) spray texture on my lower walls to match the surface was terrific. Even though the original builder had poor mud work, he could re-texture walls.
The best description I found online was from Wellington Pro Painters & Popcorn Removal. It is called How to Apply Knockdown Texture to Drywall Like a Professional. It’s simple and easy to follow. You will also find tips on preparing the compound, loading the hopper, and spraying the texture. There are many techniques for applying the surface that the authors offer, which I found fascinating.
Here’s a brief overview of the steps if you are interested in performing this task. You will need to follow the standard drywall installation procedure for the first steps. In the end, the knockdown texture of drywall is applied. Then, you can paint.
All tools necessary to apply the knockdown ceiling texture (and wall texture) are available. All drywall joints that have been taped or mudded should be sanded. To create the knockdown texture, mix the mud.
An air compressor is required. If you do not already have one, you can rent one or purchase one. You should ensure that the hopper gun you choose is compatible with the size of your air compressor.
Home Depot sold us a mixer drill attachment and a 5-gallon bucket to mix the texture. We also purchased a few 15-lb. We also bought a few 15-lb. We grabbed a few 15-lb. boxes of Wall Texture Mix, and we’re ready to go.
Prepare your work area.
This is the hardest part of our project because we want to hurry. It would help if you prepared the area you will spray. Make sure to patch all critical areas and smoothen surfaces.
New drywall must be properly taped, mudded seams, and sanded flat. Even after the job is done, you can still see the areas you have textured.
Next, ensure you protect any areas that you don’t want overspray–windows, floors, doors, outlets, and light switches. If you spray ceilings, cover the walls only. This will help you avoid the hassle of cleaning up spillages later.
For starters, consider the space you have available. For a more cozy feeling, professionals recommend texture on all four walls of a small room. If you have ample space, texturing the ceiling is a good option. It is crucial to consider the type of texture you choose and the paint color you use. To keep or increase the resale price, choosing a timeless and familiar design is a good idea. Let’s now look at the top wall textures to help you make an informed choice for your home.
According to Wellington Pro Painters & Popcorn Removal, this wall texture is one of the most in-demand. This wall texture’s orange peel-like dimpled look is subtle and easy to make, making it an excellent choice for those new to wall textures. You only need to spray on or roll a mixture of drywall compounds with water over a clean, sanded, and primed wall. This works well in smaller spaces such as a bedroom, den, or home office.
The knockdown texture is similar to orange peel but goes one step further. Bob Vila says. After creating an orange peel texture, let it dry for about 15 minutes. Then use a knife or trowel and press down on any bumps. This will provide a smoother, more warm finish than orange peel. Knockdown is an excellent choice for larger spaces like the living room, kitchen, and dining room.
Locations We Serve
We offer the above services at the following locations within Wellington:
Additional HOAs We Service
If you are located in Palm Beach County and you don’t see your city/area listed above, don’t worry! We cover all of Palm Beach County. Fill out the contact form above or CLICK HERE and send us a message. We’ll get back to you asap!
Here is a list of our services you can get at Wellington Pro Painters & Popcorn Removal:
-
Commercial Painting Near Me
-
Commercial Popcorn Removal Near Me
-
Drywall Repair Near Me
-
Drywall Installation Near Me
-
Knockdown Texture Near Me
-
Orange Peel Ceilings Near Me
-
Residential Painting Near Me
-
Residential Popcorn Removal Near Me
-
Smooth Ceiling Finish Near Me
-
Commercial Painting Services
-
Commercial Popcorn Removal Services
-
Drywall Repair Services
-
Drywall Installation Services
-
Knockdown Texture Services
-
Orange Peel Ceilings Services
-
Residential Painting Services
-
Residential Popcorn Removal Services
-
Smooth Ceiling Finish Services
-
Commercial Stucco Installation Near Me
-
Complete EIFS Reinstallation Near Me
-
Custom Stucco and Texturing Near Me
-
Denglass Framing Near Me
-
EIFS Inspection Near Me
-
EIFS Installation Near Me
-
EIFS Wall Systems Near Me
-
Exterior Kitchen Stucco Near Me
-
New Construction Stucco Near Me
-
Stucco Application Near Me
-
Commercial Stucco Installation Services
-
Complete EIFS Reinstallation Services
-
Custom Stucco and Texturing Services
-
Denglass Framing Services
-
EIFS Inspection Services
-
EIFS Installation Services
-
EIFS Wall Systems Services
-
Exterior Kitchen Stucco Services
-
New Construction Stucco Services
-
Stucco Application Services