
Best Knockdown Texture Service Contractors in Wellington, FL
Contact Us

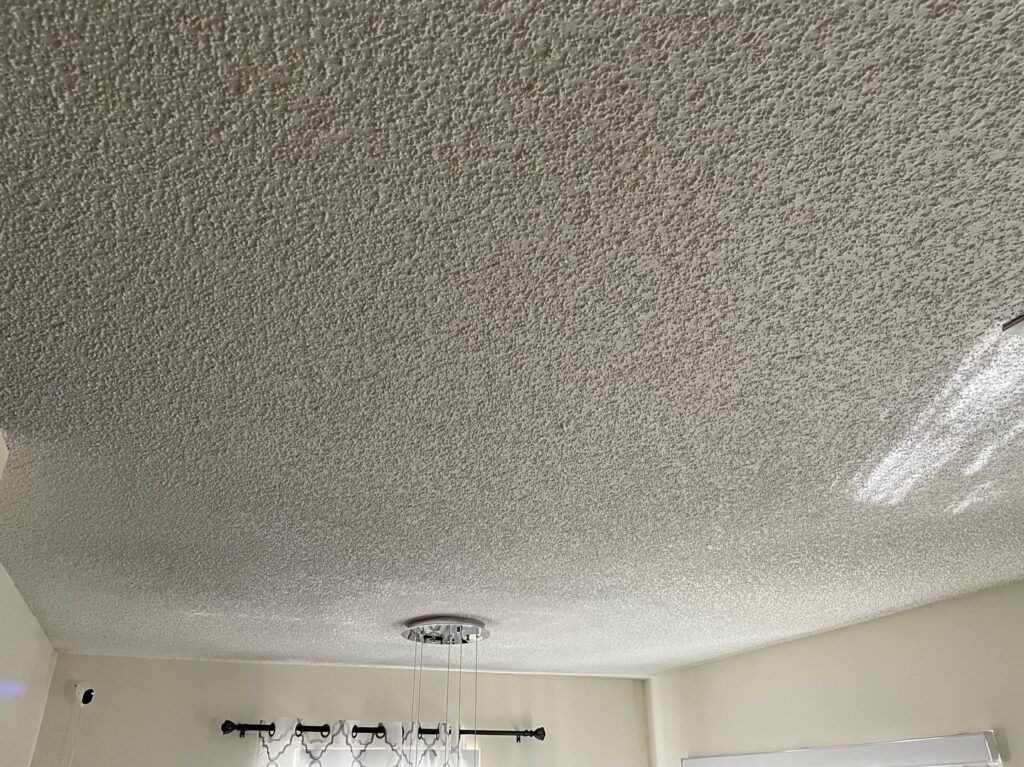
The knockdown texture on ceilings or walls is an easy, fast way of hiding repairs or flaws. For beginners, it is more forgiving than the other compositions. Also, it has a look that is more subtle than the heavy popcorn structure.
How do you texture a ceiling?
Ceilings are known to show flaws. Light shining across uninterrupted, large surface accentuates each pockmark mud, each ridge left by a paint roller.
The usual way of masking these issues is spraying on the acoustical texture of popcorn. But the knockdown texture on ceilings, whether they are on new drywall, repaired ceiling, or old plaster of any type. The beauty of the knockdown drywall is that it does not hide imperfections but creates a more subtle look than heavy textures. The typical ceiling takes less than one hour to texture and is quite less costly in materials. The best part of it is that it is impossible to get the how-to texture as long as you are following several simple steps. You can use the small texture gun to spray on your texture. However, the gun powered by the air compressor can work well in achieving textured walls.
Prepare the room
You can use a wet rag to wall texture or ceiling texture, but preventing the mess is quite faster. Move the furniture from your room and also the coverings of the wall, wall hangings, and light fixtures. You can cover the floor with the rosin paper in the place of the drop cloth because you can roll the whole mess by the end of the job and then drop it to the trash. You can overlap each rosin paper course and then tape the seams before you texture the walls.
You can then mask the top edges on the wall with masking tape. Press on the top half of your tape in one line on the top of the wall, just below the ceiling line. Towards the bottom side of the tape, use the affordable plastic drop clothes to bag the whole room.

Paint now or sometime later
You will have to apply the knockdown texture to bare the drywall and then paint it later. But when you choose to visit www.wellingtonpropainters.com to select professionals, then they will texture and then leave it unpainted. The light contrast in color between the flat white paint and off the white texture gives the ceiling a dimensional depth. There is no need of putting flash marks or lap marks while painting. The texture will hide imperfections. Depending on humidity, the ceiling will be ready to texture inside in less than three hours after the paint.
Mix the mud
Add two ins in two gallons of water and then mix the un-aggregated textured powder in it. For the knockdown texture, do not use the mixture which contains the aggregate. Continue adding water and the powder until when you think you will require it. Approximately one and a half gallons of the mix is enough for a standard room.
Put the mix aside for fifteen minutes so that it absorbs the water completely. Otherwise, your mixture will end up thickening in the hopper. It will not spray, and you will have to clean it and then start over. After the soaking period, add some more water and then mix again. The final consistency has to resemble the pancake batter. A mix that is too thick will not spray well; therefore, it is advisable to err towards thin consistency.
Practice and then spray
Use a plastic wall to test your pattern after filling the hopper. Since weeks and months may pass between the knockdown projects, you will have to relearn the spray gun feel. Your goal needs to be achieving forty percent of the whole coverage. The knockdown finish is dependent on leaving sixty percent open spaces for the splatter to get knocked down to formulate the desired effect. You can use the medium or coarse tip for applying the splatter.
After the test run, spray the ceiling. It will take about ten minutes to spray an average room. Hold the gun eighteen inches from the ceiling and work on blocks of three square feet. Try avoiding overlapping in areas where the blocks meet but do not get worried about a little overlap. Do not get worried about too much coverage. keep the gun moving to avoid heavy spraying in a particular area. Knocking the splatter down later will increase the area where the mix can cover. It is advisable to opt for lighter coverage over heavy coverage.
As you should be aware, a knockdown texture is one of the types of drywall finishing styles. Today, this type of finishing style is becoming highly popular due to its ability to hide any flaw or repair on your walls. Comparatively, it offers a faster and easier way to fix your ceiling problems. More importantly, it will give you a very subtle appearance when compared to your popcorn ceiling texture.
Why Knockdown Texture?
Ceilings are one of the places in your home, where the flaws will be clearly visible. In order to hide these flaws, traditionally, people used to apply a popcorn texture. But, popcorn ceiling texture has lost its audience today and is considered outdated by many homeowners. The new trend is your knockdown texture. Be it new drywall or an old repaired ceiling, a knockdown texture will not only hide the imperfections but also will create a more subtle appearance.
Above all, it will take you just about an hour to texture a typical ceiling, thereby being able to reduce the labor costs (if you are hiring professionals). Finally, the cost, which is an important deciding factor, is also found to be lesser. For the materials, you will have to spend just $20.
A Step-by-Step Guide to Apply a Knockdown Texture:
The best thing about choosing to apply a knockdown texture for finishing drywall is that you will not go wrong anywhere in the process if you are able to follow the following simple steps.
2. Preparing the Workspace:
This is the part most people are really bad at. The homeowners want to get started with their drywall project as soon as possible, so they will tend to start it without any preparations done. Yes, of course, you have the option of wiping away the mess with a wet rag after the project. But, the truth is that preventing the mess will be a lot faster than cleaning later on. Considering this, we will advise the readers to remove all the furniture along with the floor coverings, wall hangings, as well as light fixtures from the workspace.
While some people may prefer to use drop cloths, we will suggest you use rosin paper. This will enable you to roll up the whole mess after completing the project and discard them straight away. Next in the process of preparation is to patch the areas that really need it. Make sure the surfaces are sanded well. Now, ensure you protect the areas that should not be over-sprayed. These include:
- Windows
- Floors
- Doors
- Outlets
- Switches
3. Mixing the Wall Texture:
So, when you are done with your preparation phase, you will have to start mixing up a batch of your wall texture compound. The consistency you must aim for is a thicker pancake batter. In order not to make any mistakes in the mixing, we will ask you to add little by little until you get the required consistency.
While doing so, make sure you are mixing up more than you require. It’s better to waste some leftover mud than to be devoid of it before you complete the application. You will need approximately 1 to 1.5 gallons of the mix for a room of 10 X 14 feet.
4. Waiting for Mixture Setting:
Now, coming to the crucial step of your project, you need to set your mixture aside for at least fifteen minutes before using it. This is to enable the mixture to completely absorb the water. Without doing this, you will end up seeing your mixture getting thickened in your hopper itself and you will not be able to spray it. After this waiting period, you need to again add a little bit of water and mix it again to get the recommended pancake batter consistency.
5. Doing a Sample Test:
At this stage, you will tend to get your texture sprayed on the ceiling and the walls. But, it’s not advisable to blast the ceiling right away, especially if you are doing it for the first time. It’s always best to practice before spraying. For this, spray some part of the mixture on a scrap or on a piece of cardboard. We are sure that it will take you some time to get the nozzle and trigger settings, as well as the pressure settings on the hopper gun and air compressor respectively. When you are really happy with your practicing session, you are ready to go.
6. Applying the Texture:
For better results, we will recommend you hold your hopper gun at least two feet away from the surface and press the trigger. While doing so, keep moving the gun. Make sure to check the texture coverage often because too much spray in a single area gives a large flat appearance when your knockdown. Therefore, if you could see a thicker-than-expected concentration at any place, scrape it off at once. Likewise, if you can find a region where there is not enough texture, just go back and spray back again.
7. Knocking the Texture Down:
After applying the texture, wait for about fifteen to thirty minutes for the texture to properly set up. When you knock it down, it should be just tacky and not dry. For knocking down the texture, you should drag the knockdown blade slightly across the texture, so as to flatten the top layers of the spray. Herein, remember not to press down harder because it may remove the texture instead of flattening it.
Your aim should be to get a nice-looking, stucco-like coat. If the sharpened edges of the knockdown blades have left any lines in the texture, you must go back to smoothen them. After it’s done, leave the whole area as-is for about one day. Then, you can prime and paint it in the color of your preference. Thus, you can enjoy your newly made-up drywall!
Need for Professionals:
As you see, the whole process of applying a knockdown texture isn’t easy and there are chances that you do it incorrectly. So, doing it yourself or having it done by a non-certified worker can lead to messy results. By being sprayed on evenly instead of manually, there is a lower possibility of a mistake being made. Our certified professionals use a spray rig or hopper to apply the new texture, which will ensure a quicker finish and the best results. This choice is the most popular among contractors because it costs less to apply and will take less time to complete the job at your house or business. Contact us for a free quote today
Locations We Serve
We offer the above services at the following locations within Wellington:
Additional HOAs We Service
If you are located in Palm Beach County and you don’t see your city/area listed above, don’t worry! We cover all of Palm Beach County. Fill out the contact form above or CLICK HERE and send us a message. We’ll get back to you asap!
Here is a list of our services you can get at Wellington Pro Painters & Popcorn Removal:
-
Commercial Painting Near Me
-
Commercial Popcorn Removal Near Me
-
Drywall Repair Near Me
-
Drywall Installation Near Me
-
Knockdown Texture Near Me
-
Orange Peel Ceilings Near Me
-
Residential Painting Near Me
-
Residential Popcorn Removal Near Me
-
Smooth Ceiling Finish Near Me
-
Commercial Painting Services
-
Commercial Popcorn Removal Services
-
Drywall Repair Services
-
Drywall Installation Services
-
Knockdown Texture Services
-
Orange Peel Ceilings Services
-
Residential Painting Services
-
Residential Popcorn Removal Services
-
Smooth Ceiling Finish Services
-
Commercial Stucco Installation Near Me
-
Complete EIFS Reinstallation Near Me
-
Custom Stucco and Texturing Near Me
-
Denglass Framing Near Me
-
EIFS Inspection Near Me
-
EIFS Installation Near Me
-
EIFS Wall Systems Near Me
-
Exterior Kitchen Stucco Near Me
-
New Construction Stucco Near Me
-
Stucco Application Near Me
-
Commercial Stucco Installation Services
-
Complete EIFS Reinstallation Services
-
Custom Stucco and Texturing Services
-
Denglass Framing Services
-
EIFS Inspection Services
-
EIFS Installation Services
-
EIFS Wall Systems Services
-
Exterior Kitchen Stucco Services
-
New Construction Stucco Services
-
Stucco Application Services