Expert Knockdown Texture Service Contractors in Wellington, FL
Contact Us

Adding the knockdown texture can add interest to your wall. But if you choose to paint the wall with solid colors, you will end up diminishing the textured look. A great way of enhancing or bringing out the knockdown texture is applying the color wash faux onto the wall. One way of doing so is by using a brush to apply color to the wall and wash the glaze in the wall.
You may not have to bluff excess glaze before applying a brush to your wall. After the glaze begins drying, you can start using the damp cloth to wipe the glaze off lightly. The paint which stays in crevices will be darker than the knockdown surface, thereby causing textures to be more pronounced. After the finish is dry, you can begin adding another color.
The other way of adding the color is repeating the earlier described steps, but then, you will use a rag in the place of the brush. It is always good to use the poster board first to practice. You can buy the small texture spray container used in touching up the knockdown walls. Spray on the cardboard and allow it to dry. You can then paint the base coat available on the walls.
This is like too much work, but it is worth the job. Professionals at Wellington popcorn removal states that this step is important and then move to faux paint on walls. This is not a good idea as you will not get pleased with the results of painting over the wall. It is easy to throw the poster board and test a new one. Do not be in a very big hurry.
The popularity of the knockdown texture is growing, not just to the homeowner, but also to the contractor. When you visit www.wellingtonpropainters.com, you will realize that there are many reasons for the knockdown textures, one being the ease of application. Other features of the knockdown application include the capability of the texture to fleece imperfections in the ceiling or wall. The texture saves Wellington popcorn removal the material and labor involved in the achievement of smooth wall finishes, while giving the owner an additional option, apart from placing the current wall as a result of imperfections.

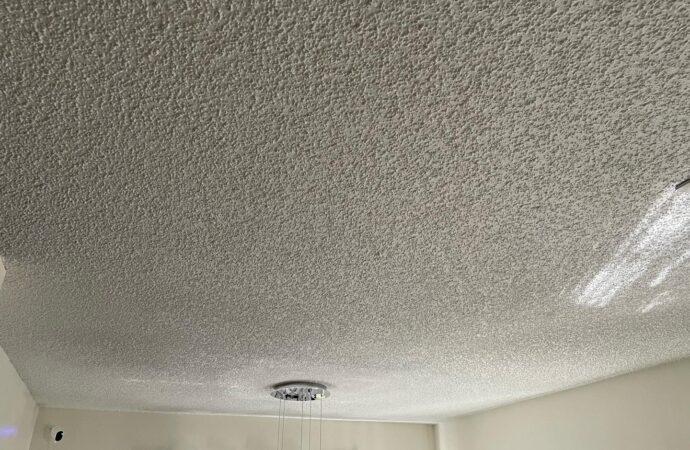
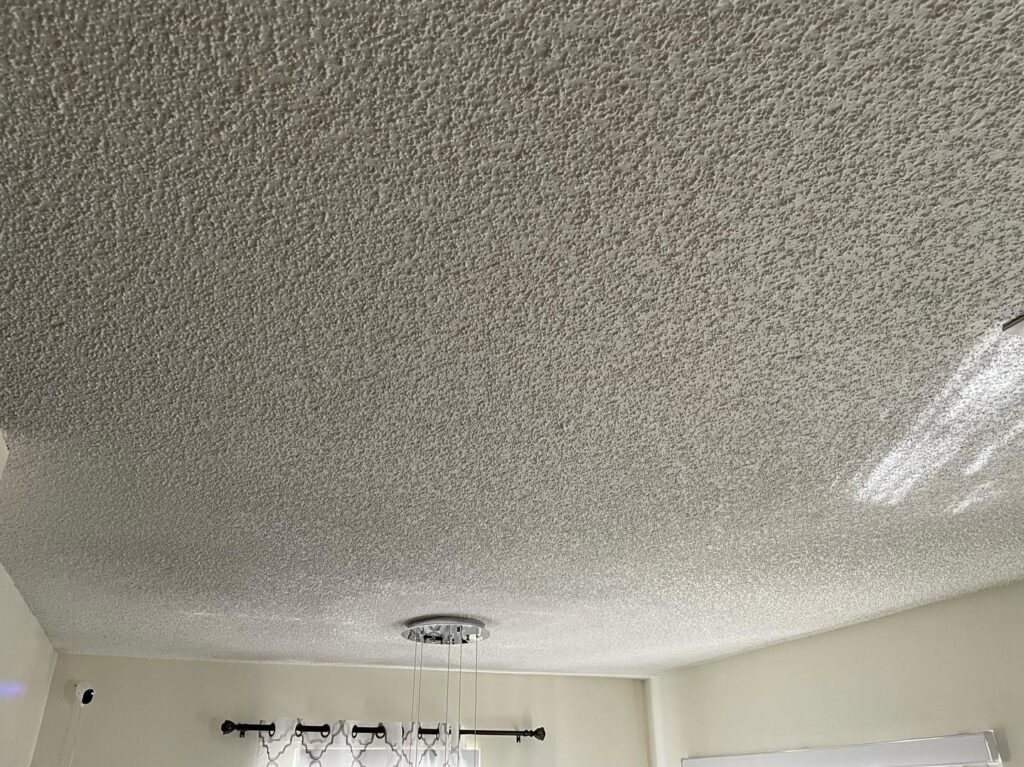
You can spray or roll knockdown texture on the ceiling or wall, then knocked it down to look like the low visible stucco, hiding some flaws, and giving you the best room. This texture is quite easy to apply, takes minimal investment, gives the room that a few neighbors and friends can have, and the best thing about it is that you can do it.
Fill the clean bucket with the right compound covering four inches from below and then add water. Mix and continue adding water to the mixture so that it seems like the pancake batter, and then pour it into the hopper. The compressor has to be set to 30 p.s.i. Hold your sprayer two feet off the sprayer and spray beginning from the top downwards, once you get to the bottom, shift over and work upwards and then move to the next wall. You need to make sure that you spray other walls as you continue keeping an eye on the applied texture. Once the top becomes dull, and there is no more shining, it is ready for a knockdown. Take note to stay on top of the texture and not the whole texture.
After the top of the texture acquires a dull finish, you can now finish the masterpiece. Take a twelve-inch knife and drag it lightly across the texture without applying so much pressure, and will give you what you want. You will realize that the texture has thinned and given it a stucco appearance. So many books written about knockdown texture suggesting beginning from top to bottom; however, for walls that are far being flat, it seems that you will yield better results by going side to side.
Clean-up is quite easy. Water, even though the texture trimmed, warm water and simple sponge will do this trick. Allow the texture to dry until the next day, and the results of hidden flaws are amazing, alongside the ease of applying it. Everybody seeing the room will like the way the rooms will be looking like.
As you should be aware, a knockdown texture is one of the types of drywall finishing styles. Today, this type of finishing style is becoming highly popular due to its ability to hide any flaw or repair on your walls. Comparatively, it offers a faster and easier way to fix your ceiling problems. More importantly, it will give you a very subtle appearance when compared to your popcorn ceiling texture.
Why Knockdown Texture?
Ceilings are one of the places in your home, where the flaws will be clearly visible. In order to hide these flaws, traditionally, people used to apply a popcorn texture. But, popcorn ceiling texture has lost its audience today and is considered outdated by many homeowners. The new trend is your knockdown texture. Be it new drywall or an old repaired ceiling, a knockdown texture will not only hide the imperfections but also will create a more subtle appearance.
Above all, it will take you just about an hour to texture a typical ceiling, thereby being able to reduce the labor costs (if you are hiring professionals). Finally, the cost, which is an important deciding factor, is also found to be lesser. For the materials, you will have to spend just $20.
A Step-by-Step Guide to Apply a Knockdown Texture:
The best thing about choosing to apply a knockdown texture for finishing drywall is that you will not go wrong anywhere in the process if you are able to follow the following simple steps.
1.Collecting the Tools:
To avoid the last-minute rush, we will ask you to have the following tools ready:
- Drywall hopper gun
- Air compressor
- Knockdown knife
- Texture mix
- Water
- Mixing bucket
- Texture mixer
2. Preparing the Workspace:
This is the part most people are really bad at. The homeowners want to get started with their drywall project as soon as possible, so they will tend to start it without any preparations done. Yes, of course, you have the option of wiping away the mess with a wet rag after the project. But, the truth is that preventing the mess will be a lot faster than cleaning later on. Considering this, we will advise the readers to remove all the furniture along with the floor coverings, wall hangings, as well as the light fixtures from the workspace.
While some people may prefer to use drop clothes, we will suggest you use rosin paper. This will enable you to roll up the whole mess after completing the project and discard them straight away.
Next in the process of preparation is to patch the areas that really need it. Make sure the surfaces are sanded well. Now, ensure you to protect the areas that should not be over-sprayed. These include:
- Windows
- Floors
- Doors
- Outlets
- Switches
3. Mixing the Wall Texture:
So, when you are done with your preparation phase, you will have to start mixing up a batch of your wall texture compound. The consistency you must aim is a thicker pancake batter. In order not to make any mistakes in the mixing, we will ask you to add little by little until you get the required consistency.
While doing so, make sure you are mixing up more than you require. It’s better to waste some leftover mud than to devoid of it before you complete the application. You will need approximately 1 to 1.5 gallons of mix for a room of 10 X 14 feet.
4. Waiting for Mixture Setting:
Now, coming to the crucial step of your project, you need to set your mixture aside for at least fifteen minutes before using it. This is to enable the mixture to completely absorb the water. Without doing this, you will end up to see your mixture getting thickened in your hopper itself and you will not be able to spray it.
After this waiting period, you need to again add a little bit of water and mix it again to get the recommended pancake batter consistency.
5. Doing a Sample Test:
At this stage, you will tend to get your texture sprayed on the ceiling and the walls. But, it’s not advisable to blast the ceiling right away, especially if you are doing it for the first time. It’s always best to practice before spraying. For this, spray some part of the mixture on a scrap or on a piece of cardboard. We are sure that it will take you some time to get the nozzle and trigger settings, as well as the pressure settings on the hopper gun and air compressor respectively. When you are really happy with your practicing session, you are ready to go.
6. Applying the Texture:
For better results, we will recommend you hold your hopper gun at least two feet away from the surface and press the trigger. While doing so, keep moving the gun. Make sure to check the texture coverage often because too much of spray in a single area give a large flat appearance when you knock down. Therefore, if you could see a thicker-than-expected concentration at any place, scrape it off at once. Likewise, if you can find a region where there is not enough texture, just go back and spray back again.
7. Knocking the Texture Down:
After applying the texture, wait for about fifteen to thirty minutes for the texture to properly set up. When you knock it down, it should be just tacky and not dry. For knocking down the texture, you should drag the knockdown blade slightly across the texture, so as to flatten the top layers of the spray. Herein, remember not to press down harder because it may remove the texture instead of flattening it.
Your aim should be to get a nice looking, stucco-like coat. If the sharpened edges of the knockdown blades have left any lines in the texture, you must go back to smoothen them. After it’s done, leave the whole area as is for about one day. Then, you can prime and paint it in the color of your preference.
Thus, you can enjoy your newly made up drywall!
Need for Professionals:
As you see, the whole process of applying a knockdown texture isn’t easy and there are chances that you do it incorrectly. So, doing it yourself or having it done by a non-certified worker can lead to messy results. By being sprayed on evenly instead of manually, there is a lower possibility of a mistake being made. Our certified professionals use a spray rig or hopper to apply the new texture, which will ensure a quicker finish and the best results. This choice is the most popular among contractors because it costs less to apply and will take less time to complete the job at your house or business. Contact us for a free quote today
Locations We Serve
We offer the above services at the following locations within Wellington:
Additional HOAs We Service
If you are located in Palm Beach County and you don’t see your city/area listed above, don’t worry! We cover all of Palm Beach County. Fill out the contact form above or CLICK HERE and send us a message. We’ll get back to you asap!
Here is a list of our services you can get at Wellington Pro Painters & Popcorn Removal:
-
Commercial Painting Near Me
-
Commercial Popcorn Removal Near Me
-
Drywall Repair Near Me
-
Drywall Installation Near Me
-
Knockdown Texture Near Me
-
Orange Peel Ceilings Near Me
-
Residential Painting Near Me
-
Residential Popcorn Removal Near Me
-
Smooth Ceiling Finish Near Me
-
Commercial Painting Services
-
Commercial Popcorn Removal Services
-
Drywall Repair Services
-
Drywall Installation Services
-
Knockdown Texture Services
-
Orange Peel Ceilings Services
-
Residential Painting Services
-
Residential Popcorn Removal Services
-
Smooth Ceiling Finish Services
-
Commercial Stucco Installation Near Me
-
Complete EIFS Reinstallation Near Me
-
Custom Stucco and Texturing Near Me
-
Denglass Framing Near Me
-
EIFS Inspection Near Me
-
EIFS Installation Near Me
-
EIFS Wall Systems Near Me
-
Exterior Kitchen Stucco Near Me
-
New Construction Stucco Near Me
-
Stucco Application Near Me
-
Commercial Stucco Installation Services
-
Complete EIFS Reinstallation Services
-
Custom Stucco and Texturing Services
-
Denglass Framing Services
-
EIFS Inspection Services
-
EIFS Installation Services
-
EIFS Wall Systems Services
-
Exterior Kitchen Stucco Services
-
New Construction Stucco Services
-
Stucco Application Services

